Do-It-Yourself Home Energy Audits, Part 1: Detecting Air Leaks

As the weather starts to really warm up and you begin to run your AC more often, you probably also start thinking about how that will impact electricity bills this summer. That’s why now is a great time to think about your home’s energy efficiency and the different ways you can lower your cooling costs.
The first thing you’ll need to do is conduct a home energy audit, which will give you a better idea of what kind of energy efficiency improvements you can make. You can always hire a professional to perform the audit. But, if you’re like us, you’d rather take the do-it-yourself approach. Thankfully, a DIY home energy audit is a pretty simple and straightforward, four-part process.
5 Steps for Detecting Air Leaks
There are five steps you can take to complete a thorough DIY air leak inspection:
1. Make a list of obvious targets for indoor air leaks
Grab a piece of paper, a clipboard and a pencil. Make a list of obvious places inside your home that have potential gaps or cracks that can allow air to flow in and out:
- Attic hatches
- Baseboards
- Electrical Outlets
- Fireplace dampers
- Mail slots
- Pipes
- Switch plates
- Wall- or window-mounted AC units
- Weather stripping around doors
- Window frames
2. Perform a visual inspection
A quick visual inspection of the potential problem areas on your list should be able to reveal significant air leaks. Make sure that all caulk and weatherstripping are applied properly, in good condition, and without gaps or cracks.
If you see daylight around a door or window frame, then there’s definitely a leak. Also, try and rattle your windows and doors. If you can move one by shaking it gently, then there’s probably an air leak.
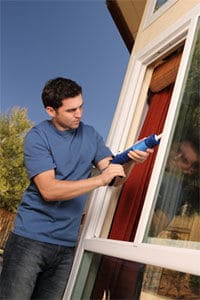
Seal any gaps that you can see with caulk or weather stripping. If your doors and windows are old, you may want to consider upgrading to new, energy-efficient doors and windows.
3. Fine tune your search for air leaks
Once you complete a visual inspection for obvious air leaks you can fine tune your search for the leaks that aren’t as obvious. You can do this by conducting a basic building pressurization test, which makes leaks easier to detect:
- Close all exterior doors, windows and fireplace flues
- Turn off all appliances with pilot lights, such as gas water heaters and gas-burning furnaces
- Turn on all exhaust fans, such as those in the kitchen and bathrooms
Then, light a stick of incense and hold it next to the locations on your list. If the smoke is sucked in or blown out, then you know you have an air leak.
Caulk is usually your best choice for sealing these smaller leaks.
4. Take your search for air leaks outside
Next, take your clipboard and pencil and search for air leaks on the outside of your home. As a general rule, you want to check any part of your home where two different building materials meet:
- Areas where the foundation meets the bottom of exterior brick or siding
- Exterior corners
- Places where pipes, electrical outlets and wiring enter the home (through brick mortar, siding or the foundation)
- Where siding and chimneys meet
You’re going to have to rely more on a visual inspection (since a pressurization test won’t work outside, for obvious reasons) to check for exterior air leaks. For best results, make sure that all external areas are appropriately sealed. If not, or if you can see gaps or cracks in the mortar, siding or foundation even if they’re not around things like pipes or wiring seal them with the appropriate material.
5. Beware of indoor air pollution and appliance backdrafts
Sealing your home uptight is a good idea, but, if no air is able to get in or out, you’ll create a potential hazard from indoor air pollution or appliance backdrafts (when an exhaust fan pulls combustion gasses from gas-powered water heaters and furnaces into the living space).
When sealing air leaks, make sure combustion appliances have adequate air supplies. As a general rule, one square inch of vent opening is required for each 1,000 Btu of appliance input heat.
If you have questions about sealing air leaks and combustion appliances, play it safe and contact a professional ventilation contractor or your utility company.
A Word on Caulking
When sealing air leaks with caulk, make sure to choose the right kind of caulk and read up on how to apply it correctly.
Do-It-Yourself Home Energy Audits: Air Leaks, HVAC Equipment and Lighting
Now that you know how to detect and repair air leaks, make sure to read up on the other steps involved in a four-part DIY home energy audit:
Part 1: Detect Air Leaks
Part 3: Inspect HVAC Equipment
Sources
U.S. Department of Energy, Energy Efficiency & Renewable Energy, “Do-It-Yourself Home Energy Assessments.”


